How to supercharge your web with 3D capabilities by using Rust and Bevy
While Bevy is primarily a video game development tool, any real-time 3D application would benefit from game engine utilization as it offers the most mature technologies and tools - and the web is ready for more 3D.
Building beautiful websites with a glorious user experience is quite fine. However, within our team, we like to promote new and creative approaches to application design. We daily look for new and exciting technologies not only in web development but in all other spheres of software development.
Since we strive to make Rust lingua franca for applications built in-house, the path led us to explore game development engines written in Rust. Bevy caught our attention for numerous reasons: it has over 13k stars on GitHub; it’s an open-source ECS game engine; it uses WebGPU specification graphics backend; the launch of Bevy Reddit post is the most upvoted post on the Rust subreddit.
Intrigued by it, we immediately started exploring the capabilities of this, by all accounts, marvelous piece of software. In the next paragraphs, we will explore Bevy's workflow which is incredibly straightforward, simple, and most importantly - fun. We will also showcase its capabilities to build capable and great-looking 3D applications not only for native systems but also for the web.
Let’s get started
Bevy is a barebones Rust game development engine with no GUI - everything is done by writing code. It is an ECS (Entity Component System), a data-driven engine. In a nutshell, entities are just unique “things” in the application, represented by a unique ID. Components are parts of those things which describe them (position, model, color, name), and systems process those components.
The engine is still in the alpha phase (version 0.6.0) at the time of writing this article and is being rapidly developed. Therefore, the documentation at the moment is still pretty basic because of the rapid pace at which the API changes and most of the learning is done by following examples which are available in the official Bevy GitHub repository.
And now it’s time to write some code!
We will create a simple scene with a fairly large and detailed model, add some lighting, animate those lights and the end result will look something like this:
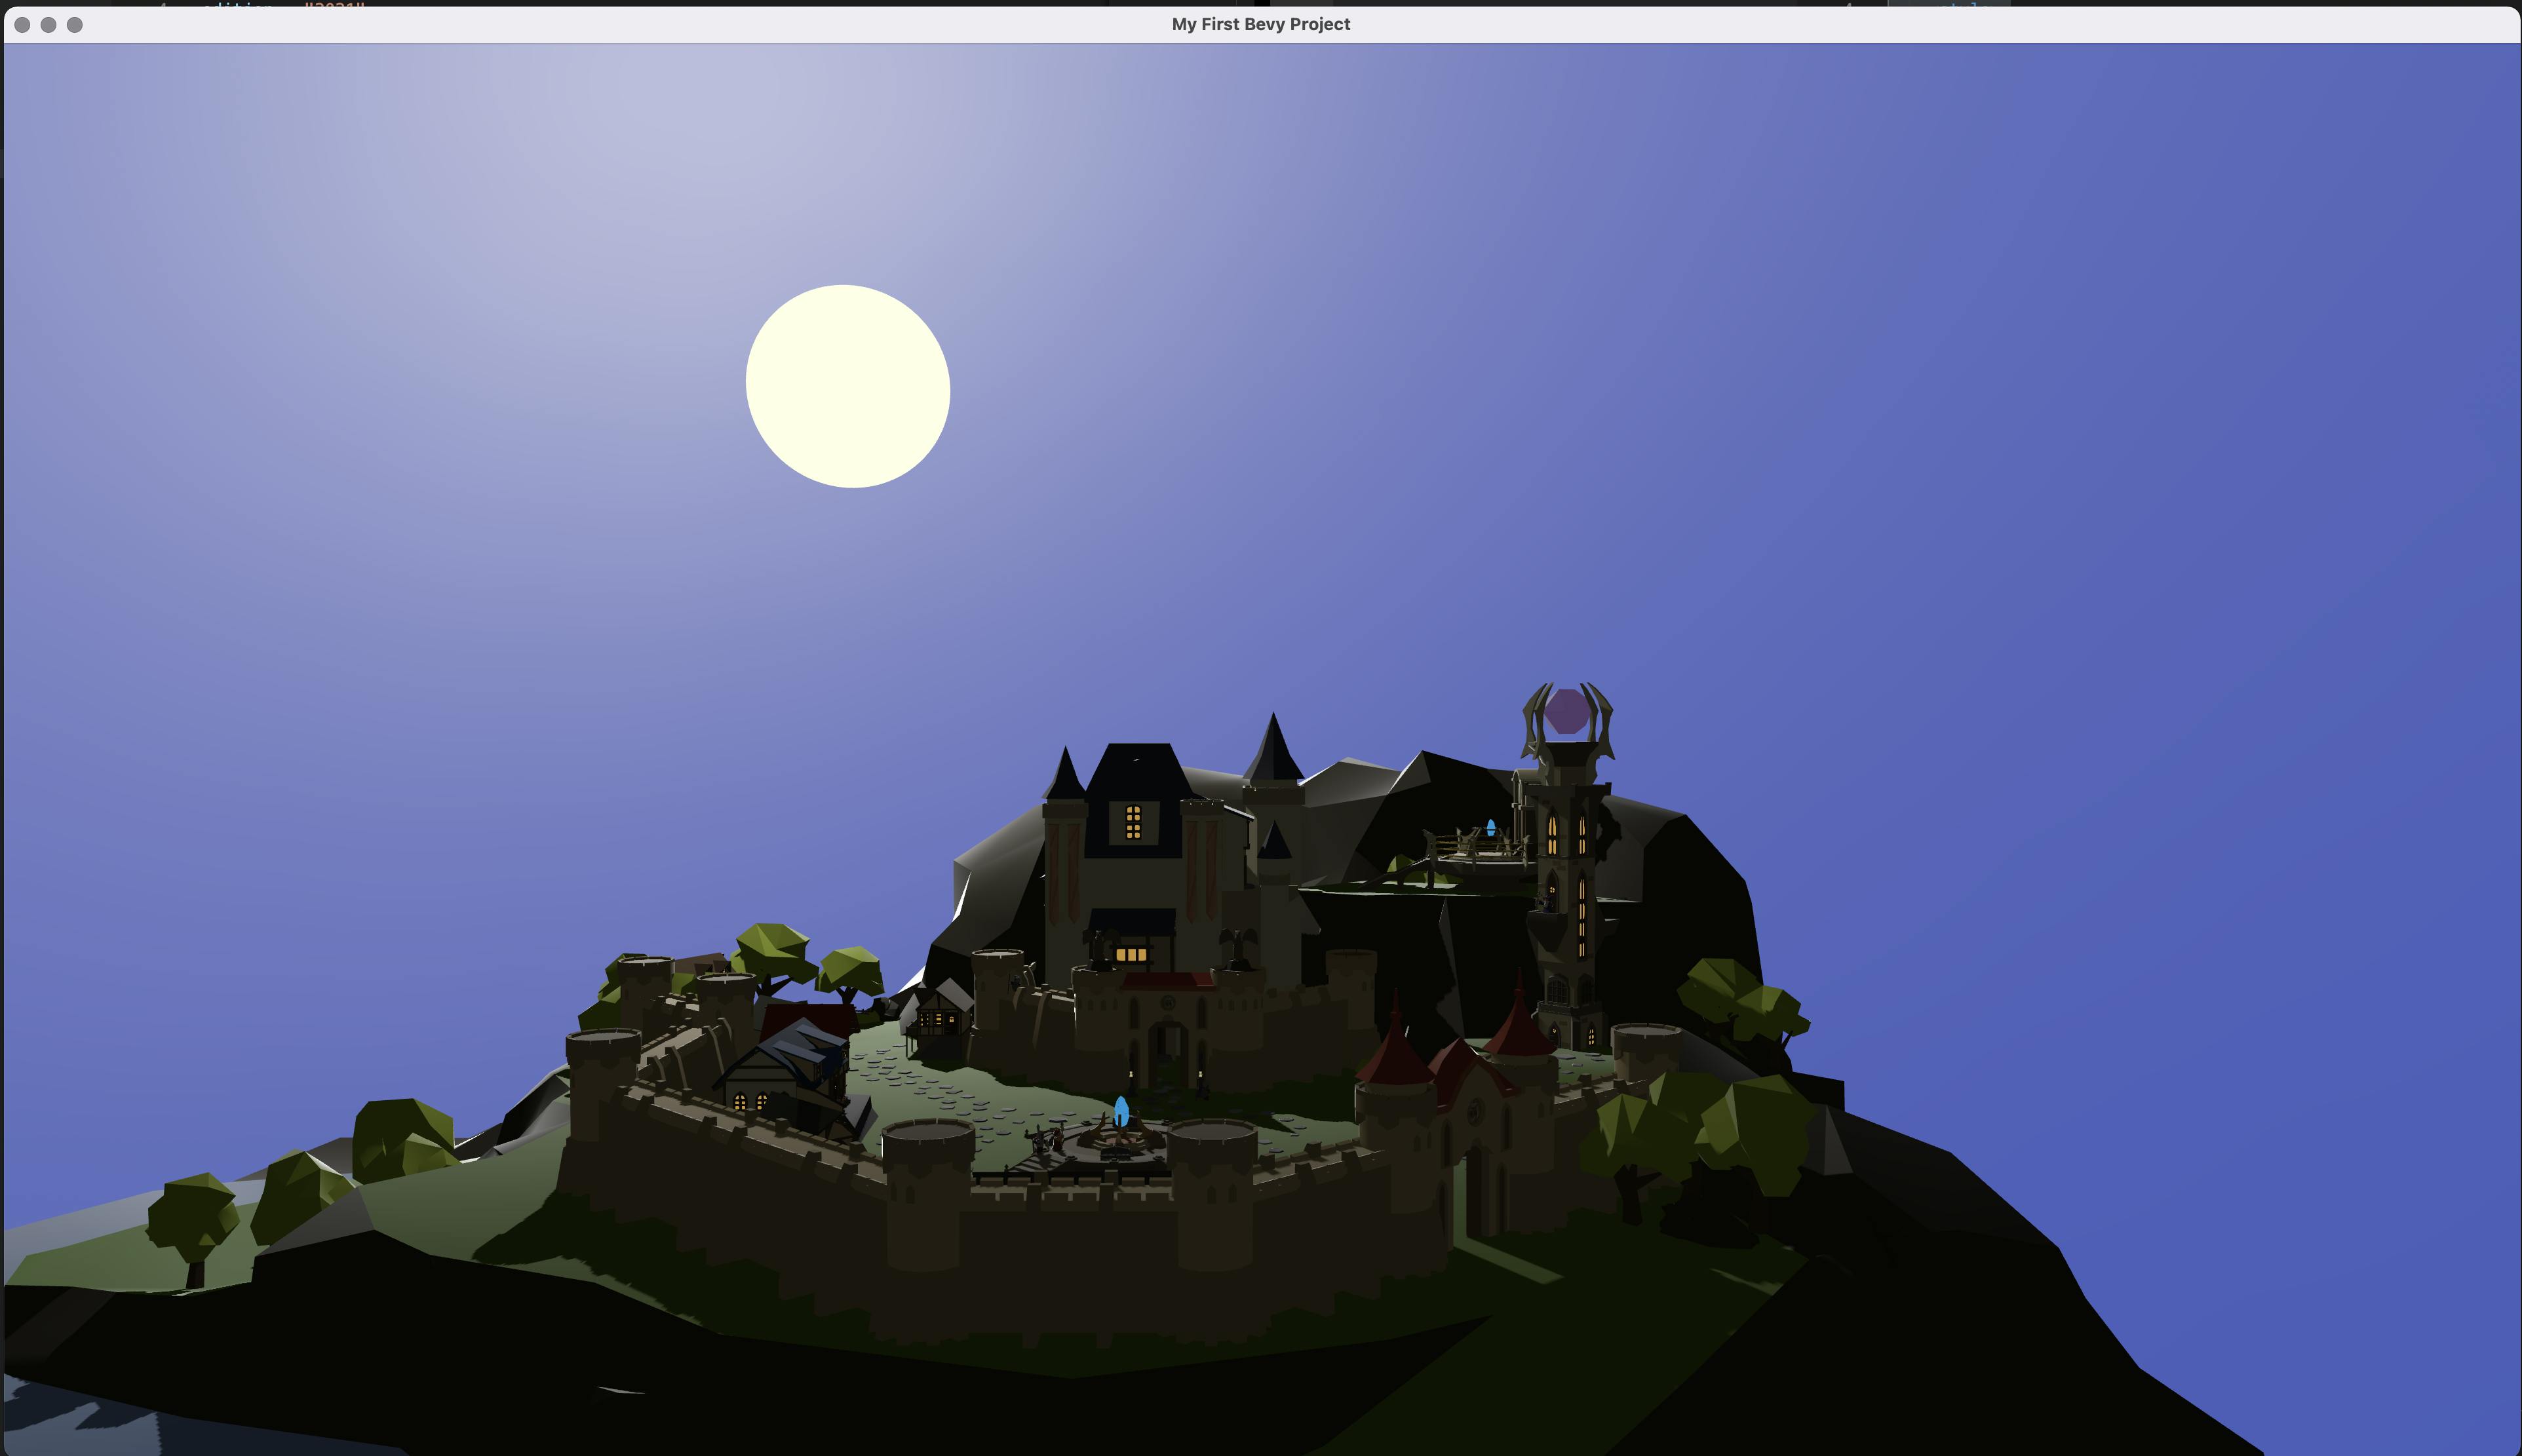
Finished application preview
For this, you’ll need to have the Rust development environment already set up, some kind of text editor installed on your system and you’ll need to use a UNIX-like operating system or bash emulator on Windows. In case you do not have Rust installed please follow the installation guide.
Now, let us create a binary crate (a crate is the name for a Rust executable or a library). After the crate is created, let’s move inside the newly created root directory of the crate.
cargo new my-first-bevy-project
cd my-first-bevy-project
Inside the directory run:
cargo runIf everything is correct this output should appear in your terminal window:
Compiling my-first-bevy-project v0.1.0 (/Users/blipovac/Documents/Projects/my-first-bevy-project)
    Finished dev [unoptimized + debuginfo] target(s) in 0.49s
     Running `target/debug/my-first-bevy-project`
Hello, world!
Bevy is a library crate that we need to include in our project. In order to do so, we need to open cargo.toml file in our project and add the following:
File: /cargo.toml:
[workspace]
resolver = "2"

[dependencies]
bevy = "0.6.0"
The file should already contain some information about your project such as the name, version, and the Rust edition that your project uses.
Dependencies are external libraries that our project will use - we specify that we want to add the Bevy library to our project and that we will use the 0.6.0 version, which is the latest stable version released on crates.io (package repository for Rust).
After we have added Bevy to our project, we will instantiate a window and to do this, we’ll have to rewrite the content of our src/main.rs file:
File: /src/main.rs:
use bevy::prelude::*;

fn main() {
   App::new()
       .insert_resource(WindowDescriptor {
           title: "Bevy Example".to_string(),
           width: 1920.0,
           height: 1080.0,
           vsync: true,
           ..Default::default()
       })
       .add_plugins(DefaultPlugins)
       .run();
}
We import the Bevy prelude which contains all the structs, enums, and function definitions we need in order to work with Bevy. The app is an instance of a Bevy application and we insert a Window resource to it. WindowDescriptor struct is used to describe the properties of our window. We call and destructure the default() function in order to use the default values for the WindowDescriptor which the library developers implemented for us.
We add the DefaultPlugins to our application because they are necessary for the application to work properly and finally we call the run() function which will start the application. If we were successful a window like this will appear after running the cargo run command.
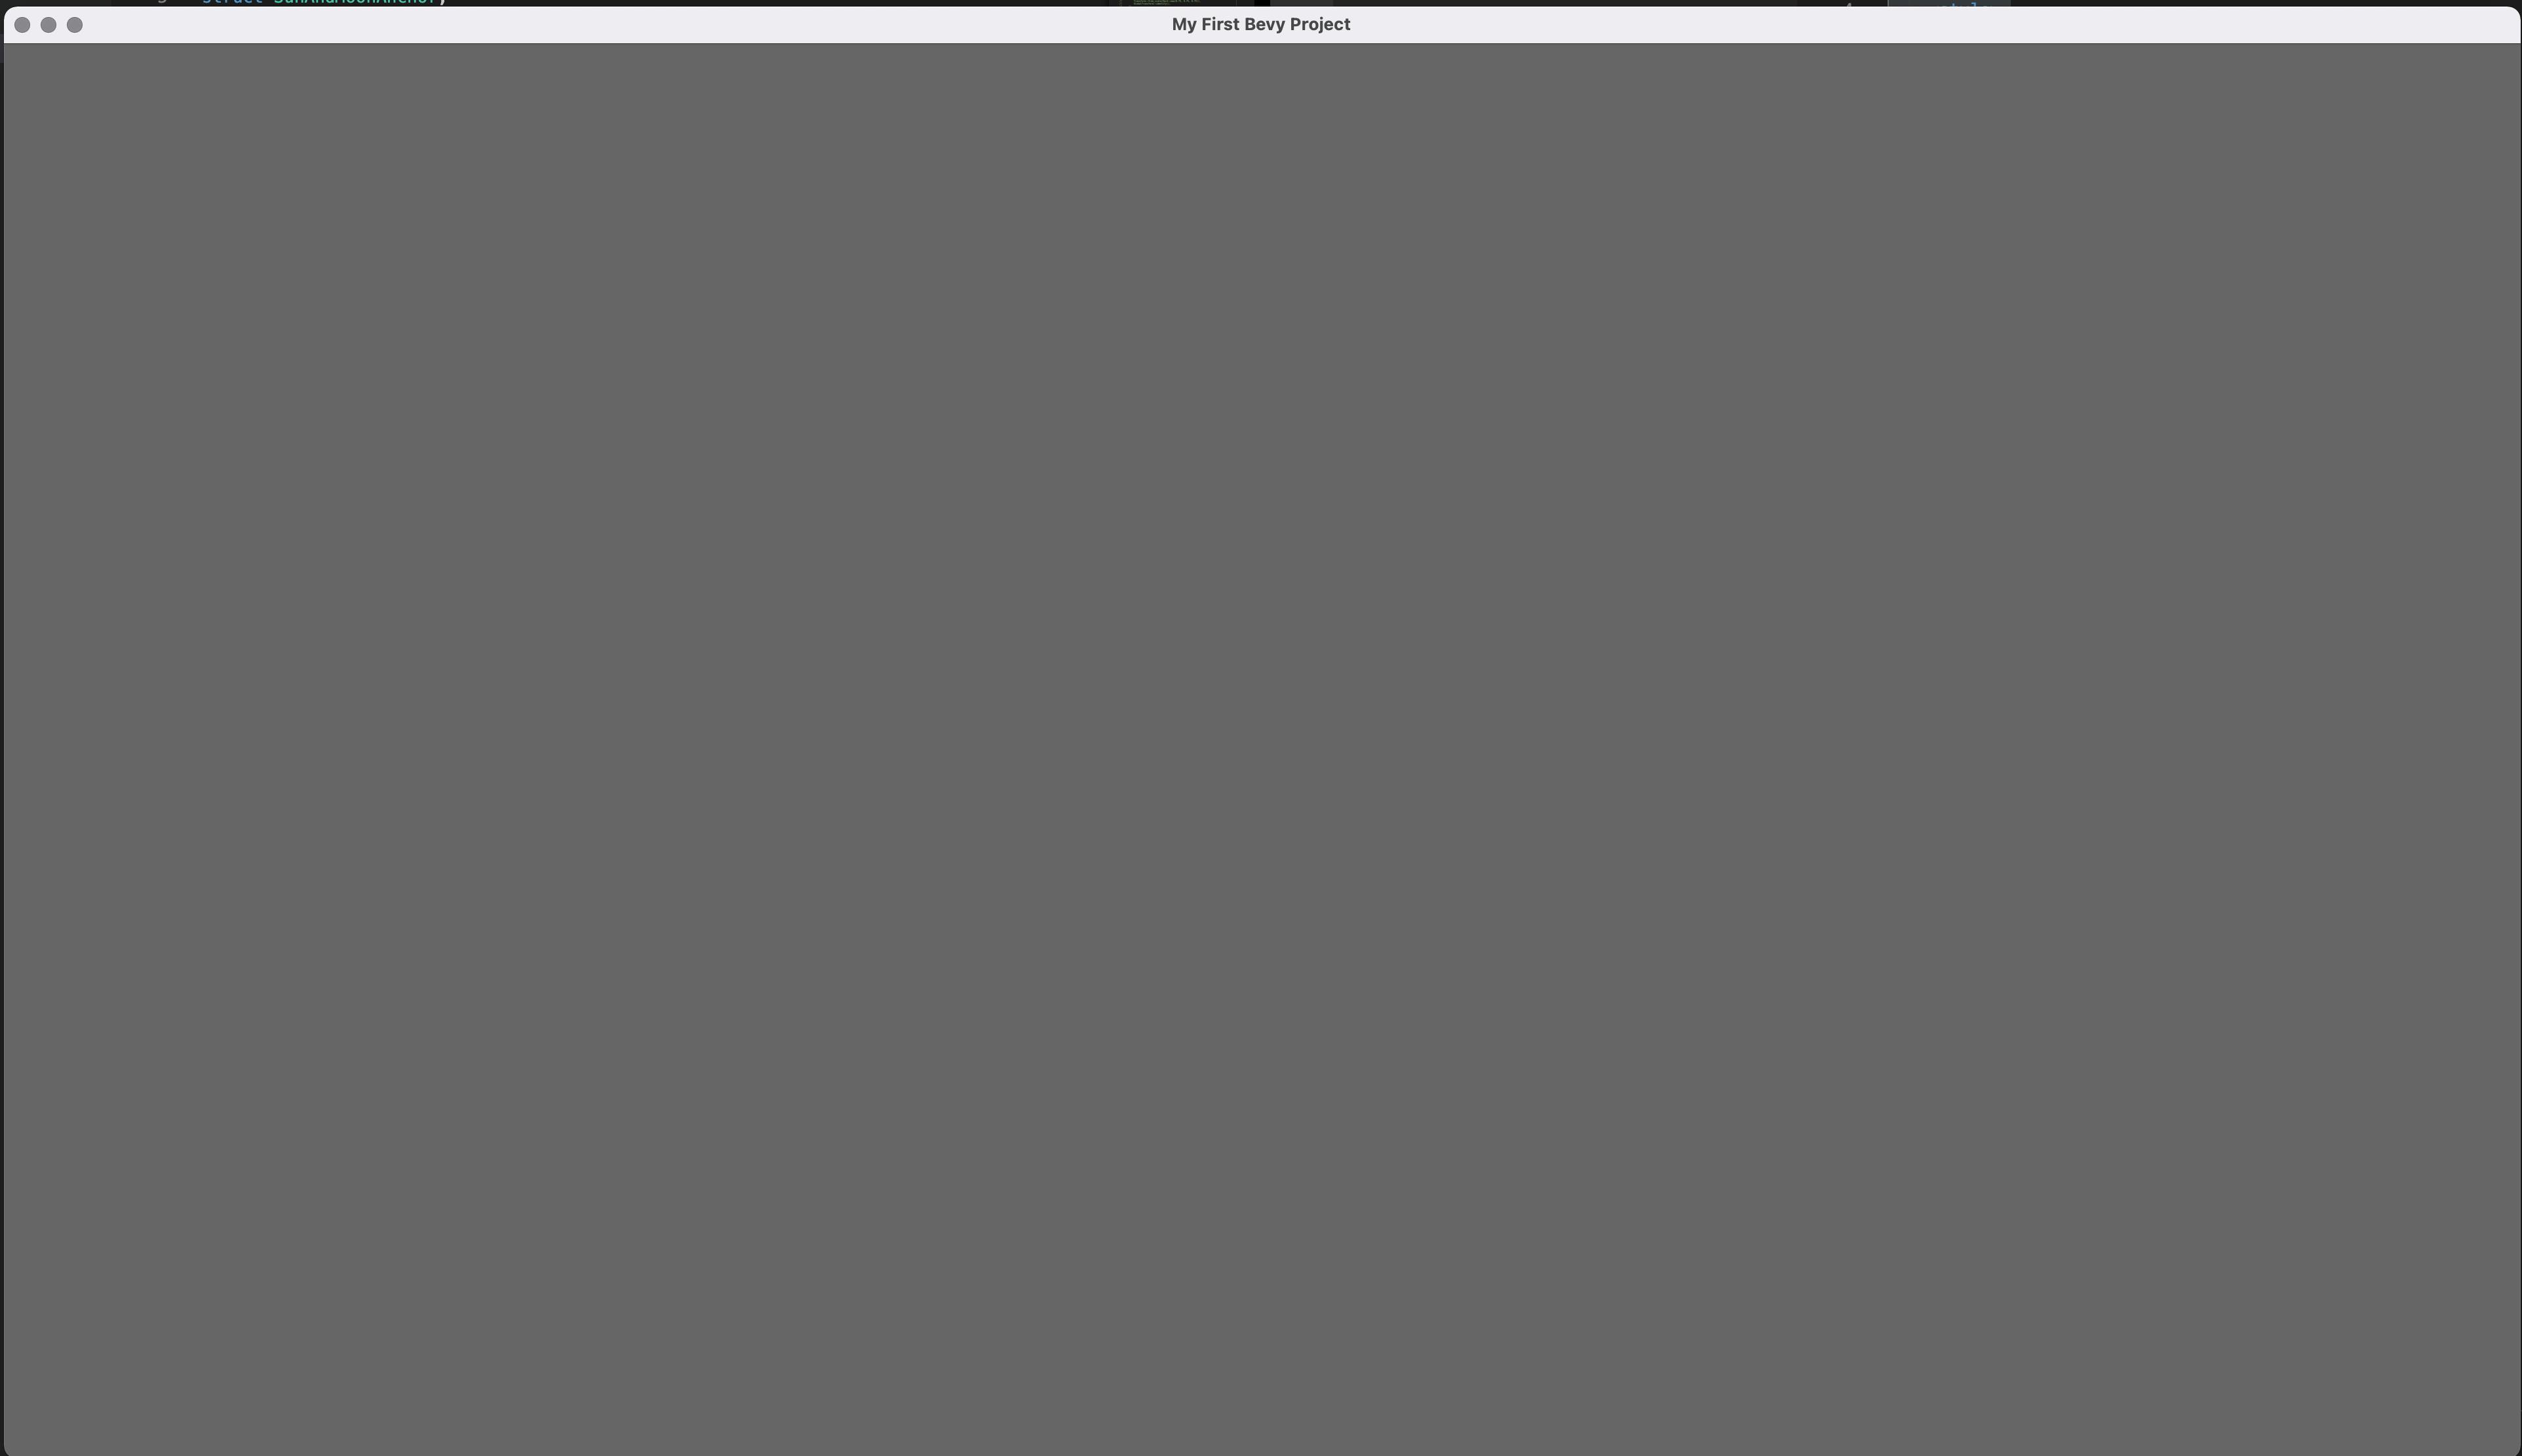
Empty window instance
It is time to add something to our application to look at. If you are a 3D artist, feel free to use some of your own models but if you are not, we will borrow a premade one. Let’s download this model (many thanks to the author Alok for supplying such a great model for us to work with).
In order to download the model, you will have to register to Sketchfab (social logins available). When downloading the model it is PARAMOUNT that you download it in .gltf format which is the format supported by Bevy.
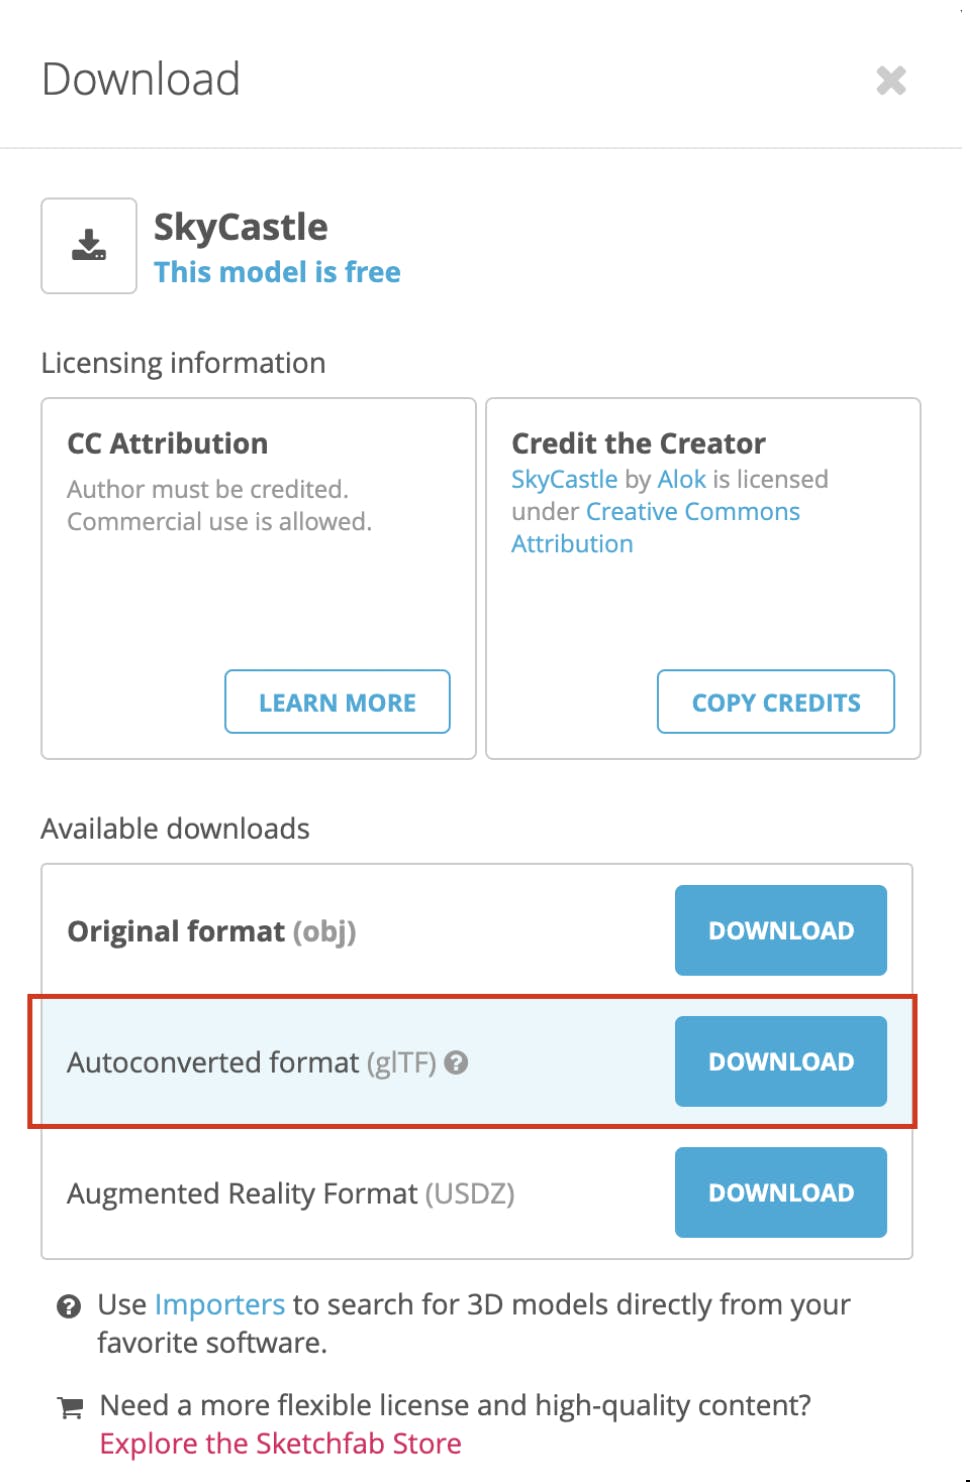
Download 3D model in .gltf format
When you’ve downloaded the model, create a directory in the root of our Bevy application called assets where you will store the model.
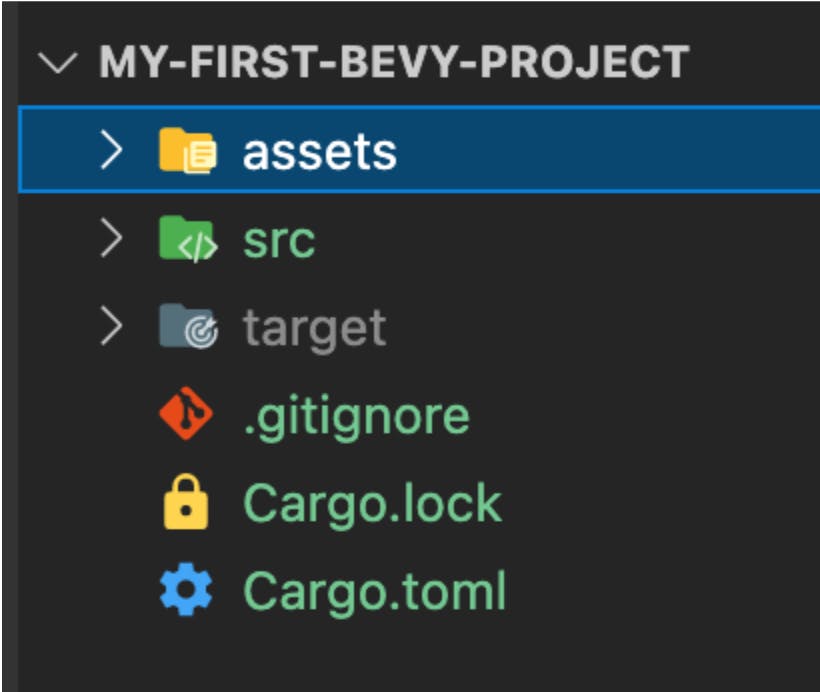
Add assets folder to Bevy project
Now, copy the downloaded model to the assets directory and unpack it (you can delete the archived files). After unpacking the archive your assets folder should look like this:

Folder structure after unpacking the 3D model
Now back to code again! We will have to load this model into our application. To do this, we will use the Bevy asset loader. Also, we will have to create a system that will call the asset loader upon our application start. Write this function into our main file.
File: src/main.rs
fn setup(
   mut commands: Commands,
   asset_server: Res<AssetServer>
) {
   // skycastle scene
   commands
       .spawn_bundle((
           Transform::from_scale(Vec3::new(0.75, 0.75, 0.75)),
           GlobalTransform::identity(),
       ))
       .with_children(|parent| {
        parent.spawn_scene(asset_server.load("skycastle/scene.gltf#Scene0"));
       });
}
Commands are functions responsible for spawning entities to our application and adding components to them. We spawn an entity which will act as a parent to our model so that we will be able to move, scale, rotate or do whatever we want with our model. All that is left to do is to edit our main() function to call our setup system.
File: src/main.rs
fn main() {
   App::new()
       .insert_resource(WindowDescriptor {
           title: "My First Bevy Project".to_string(),
           width: 1920.0,
           height: 1080.0,
           vsync: true,
           ..Default::default()
       })
       .add_plugins(DefaultPlugins)
       .add_startup_system(setup)
       .run();
}
If we ran our application now, we would not be able to see anything because we have no camera in our application. We will use bevy_fly_camera library to enable us to see our application as well as to float around our scene.
We will have to edit our cargo.toml file to add the bevy_fly_camera dependency to our application. Also we will have to import the library into our main.rs file.
File /cargo.toml
[dependencies]
bevy = "0.6.0"
bevy_fly_camera = "0.8.0"
File: /src/main.rs
use bevy::prelude::*;
use bevy_fly_camera::{FlyCamera, FlyCameraPlugin};

fn main() {
   App::new()
       .insert_resource(WindowDescriptor {
           title: "My First Bevy Project".to_string(),
           width: 1920.0,
           height: 1080.0,
           vsync: true,
           ..Default::default()
       })
       .add_plugins(DefaultPlugins)
       .add_startup_system(setup)
       .add_plugin(FlyCameraPlugin)
       .run();
}
Also we will have to edit our setup() function because we need to spawn the camera into our application. So, inside our setup() function, add the following code:
File: /src/main.rs
 commands
       .spawn_bundle(PerspectiveCameraBundle {
       transform: Transform::from_xyz(77.29518, 45.52165, 79.8828),
       ..Default::default()
           })
       .insert(FlyCamera::default());
The transform coordinate values are quite arbitrary and are there to position our camera somewhere outside of the mesh of the model. When we start the application with cargo run, we should see the model inside our application window. Also, we are able to fly around using WASD keys, look around with the mouse, lower the camera with the left shift and raise the camera with the space bar. When you are done flying around, you can get control of your mouse cursor back by hitting the escape button.
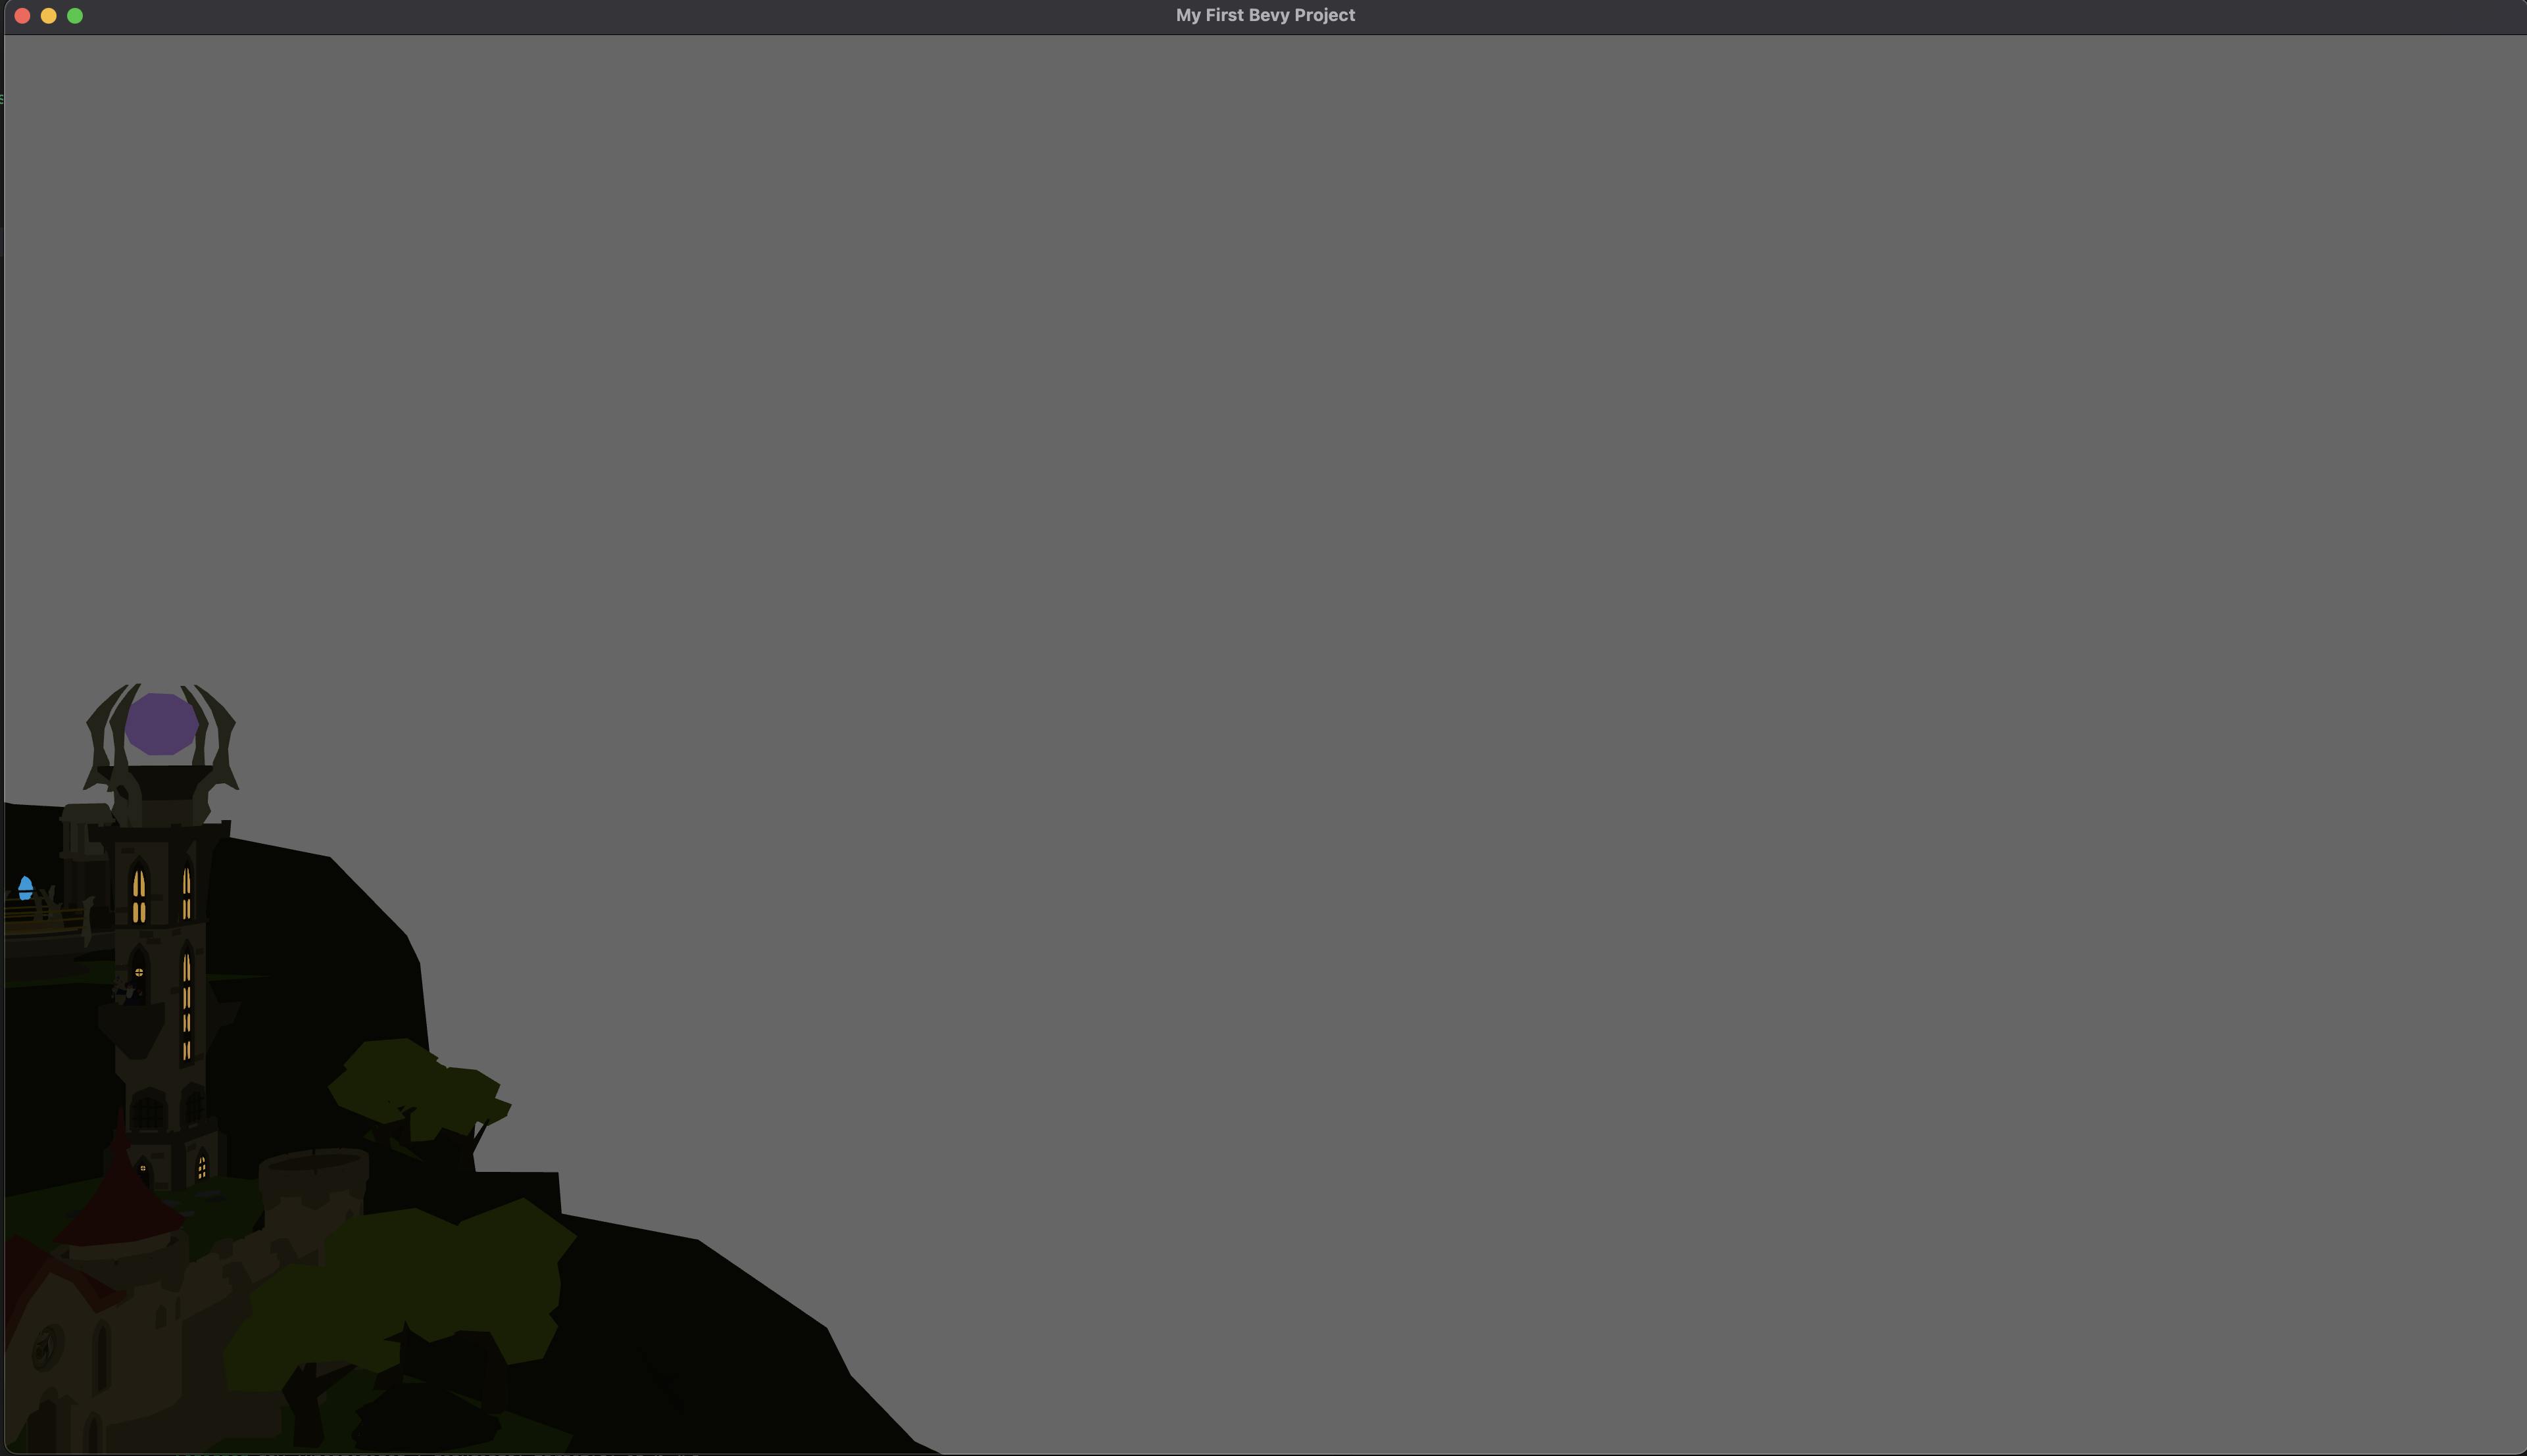
View in the application window after successfully loading the model
Let there be light
Since our scene is a little dark, we should add some light to it. We will add two lights which will act as the Sun and the Moon and they will rotate around our floating island.
Firstly, we have to define a component that we will use for querying. Write the following code somewhere outside of main() and setup() function definitions.
File: /src/main.rs
#[derive(Component)]
struct SunAndMoonAnchor;
Now, we have to spawn meshes that will act as the Sun and the Moon. Before we do that, we have to change the setup() function signature.
File: /src/main.rs
fn setup(
   mut commands: Commands,
   asset_server: Res<AssetServer>,
   // Adding these two resources will allow us to create a mesh
   // And add materials (color etc.) to them
   mut meshes: ResMut<Assets<Mesh>>,
   mut materials: ResMut<Assets<StandardMaterial>>,
)
After editing the signature, we add the following code to the rest of the function definition:
File: /src/main.rs
 // First we spawn a parent entity which will serve as an anchor for our
   // Sun and moon rotation.
   Commands
       .spawn_bundle((
           Transform::from_xyz(0.0, 0.0, 0.0),
           GlobalTransform::identity(),
       ))
   // Here we add the component which will help us query the entity     .insert(SunAndMoonAnchor)
   // Next we create some simple meshes called UVSpheres, which are just
   // Essentially globes.
       .with_children(|builder| {
           builder
               .spawn_bundle(PbrBundle {
                   mesh: meshes.add(Mesh::from(shape::UVSphere {
                       sectors: 128,
                       stacks: 64,
                       ..Default::default()
                   })),
                   material: materials.add(StandardMaterial {
                       // We define the base color as yellowy white
                       base_color: Color::rgb(1.0, 1.0, 0.8),
                       // And add a glowy color to the mesh as well
                       emissive: Color::rgb(1.0, 1.0, 0.8),
                       unlit: true,
                       ..Default::default()
                   }),
    // Since this mesh is a child of the “anchor” entity this transform is
    // Relative to the parent entity, we will take advantage of this when
    // We add rotation to our meshes
                   transform: Transform::from_xyz(0.00, 100.00, 0.0).with_scale(Vec3::splat(10.00)),
                   ..Default::default()
               })
   // Our mesh will have a child of it’s own. The actual source of light.
   // Light generally do not need to be parented to a mesh but we do this
   // To have some visual representation to look at.
               .with_children(|children| {
                   children.spawn_bundle(PointLightBundle {
   // Light values are quite arbitrary and were set by trial and error to
   // Achieve sun-like behaviour.
                       point_light: PointLight {
                           color: Color::rgb(1.0, 1.0, 1.0),
                           intensity: 100000.0,
                           radius: 10000.00,
                           range: 100000.0,
                           shadows_enabled: true,
                           ..Default::default()
                       },
                       ..Default::default()
                   });
               });
   // We repeat the process for the moon mesh with slight differences
   // Notice that we don’t scale up the moon to make it smaller than the sun
               builder.spawn_bundle(PbrBundle {
                   mesh: meshes.add(Mesh::from(shape::UVSphere {
                       sectors: 128,
                       stacks: 64,
                       ..Default::default()
                   })),
  // We make it a slightly bluer color than the sun by increasing the blue
  // Color component.
                   material: materials.add(StandardMaterial {
                       base_color: Color::rgb(1.0, 1.0, 0.9),
                       emissive: Color::rgb(1.0, 1.0, 0.9),
                       unlit: true,
                       ..Default::default()
                   }),
  // And we spawn the moon diametrically opposite of the sun
                   transform: Transform::from_xyz(0.00, -100.00, 0.0).with_scale(Vec3::splat(5.00)),
                   ..Default::default()
               })
               .with_children(|children| {
                   children.spawn_bundle(PointLightBundle {
   // Also, we decrease the luminosity values of the moon
                       point_light: PointLight {
                           color: Color::rgb(0.9, 0.9, 1.0),
                           intensity: 5000.0,
                           radius: 475.00,
                           range: 750.0,
                           shadows_enabled: true,
                           ..Default::default()
                       },
                       ..Default::default()
                   });
               });
       });
If all is good and well, after we cargo run our application, we should see that our scene is much prettier to look at than before! Do not forget that you can float around the scene to check everything out!
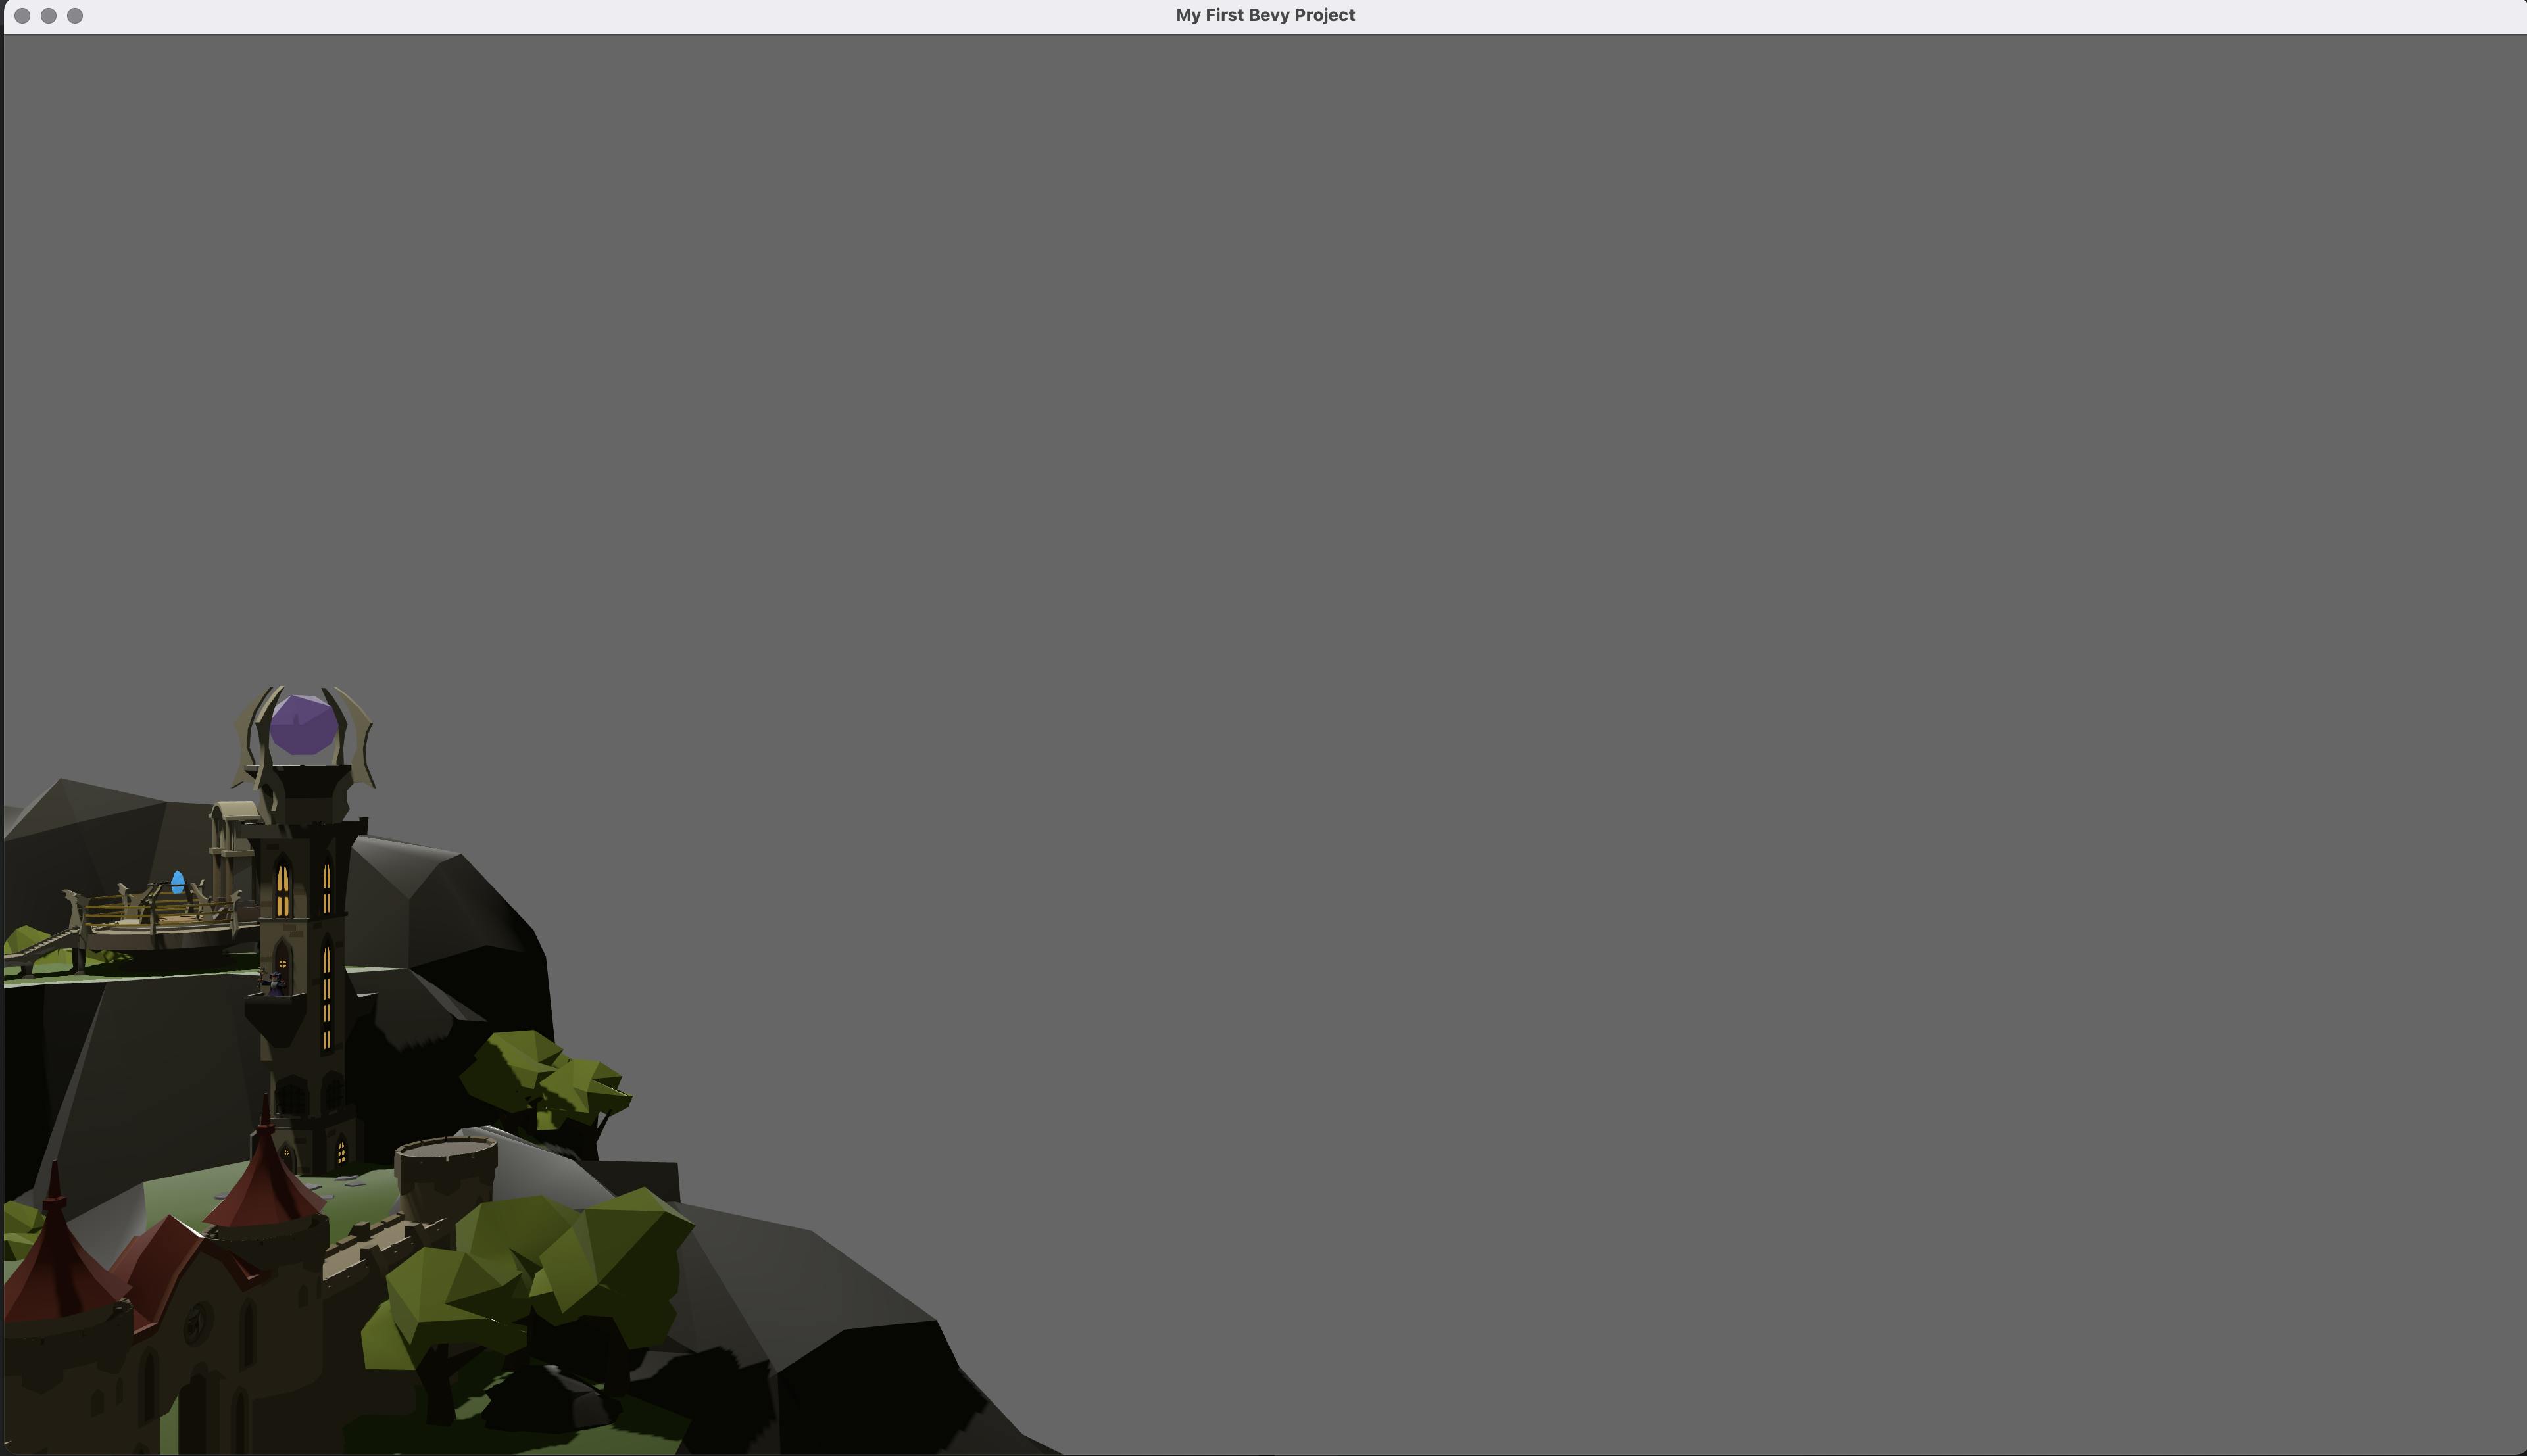
View in the application window after successfully adding the lighting
Sky is the limit
All that is left in our scene building is to add something to act like the sky. At this point, we should probably disclaim that this is not the usual industry process of creating lighting, skyboxes etc. but since this is a show and tell we have all the creative liberty. Add the following code inside setup() function definition.
File: /src/main.rs
  commands.spawn_bundle(PbrBundle {
       mesh: meshes.add(Mesh::from(shape::Capsule {
   // We make the dimensions negative because we want to invert the direction
   // of light the mesh diffuses (invert the normals).
           radius: -150.0,
           depth: -1.0,
           ..Default::default()
       })),
  // We make the mesh as rough as possible to avoid metallic-like reflections
       material: materials.add(StandardMaterial {
           perceptual_roughness: 1.0,
           reflectance: 0.0,
           emissive: Color::rgb(0.0, 0.05, 0.5),
           ..Default::default()
       }),
       transform: Transform::from_xyz(0.0, 0.0, 0.0)
           .with_scale(Vec3::new(1.0, 1.0, 1.0)),
       ..Default::default()
   });
Again, if all went well, this should be the result we see after doing a cargo run:
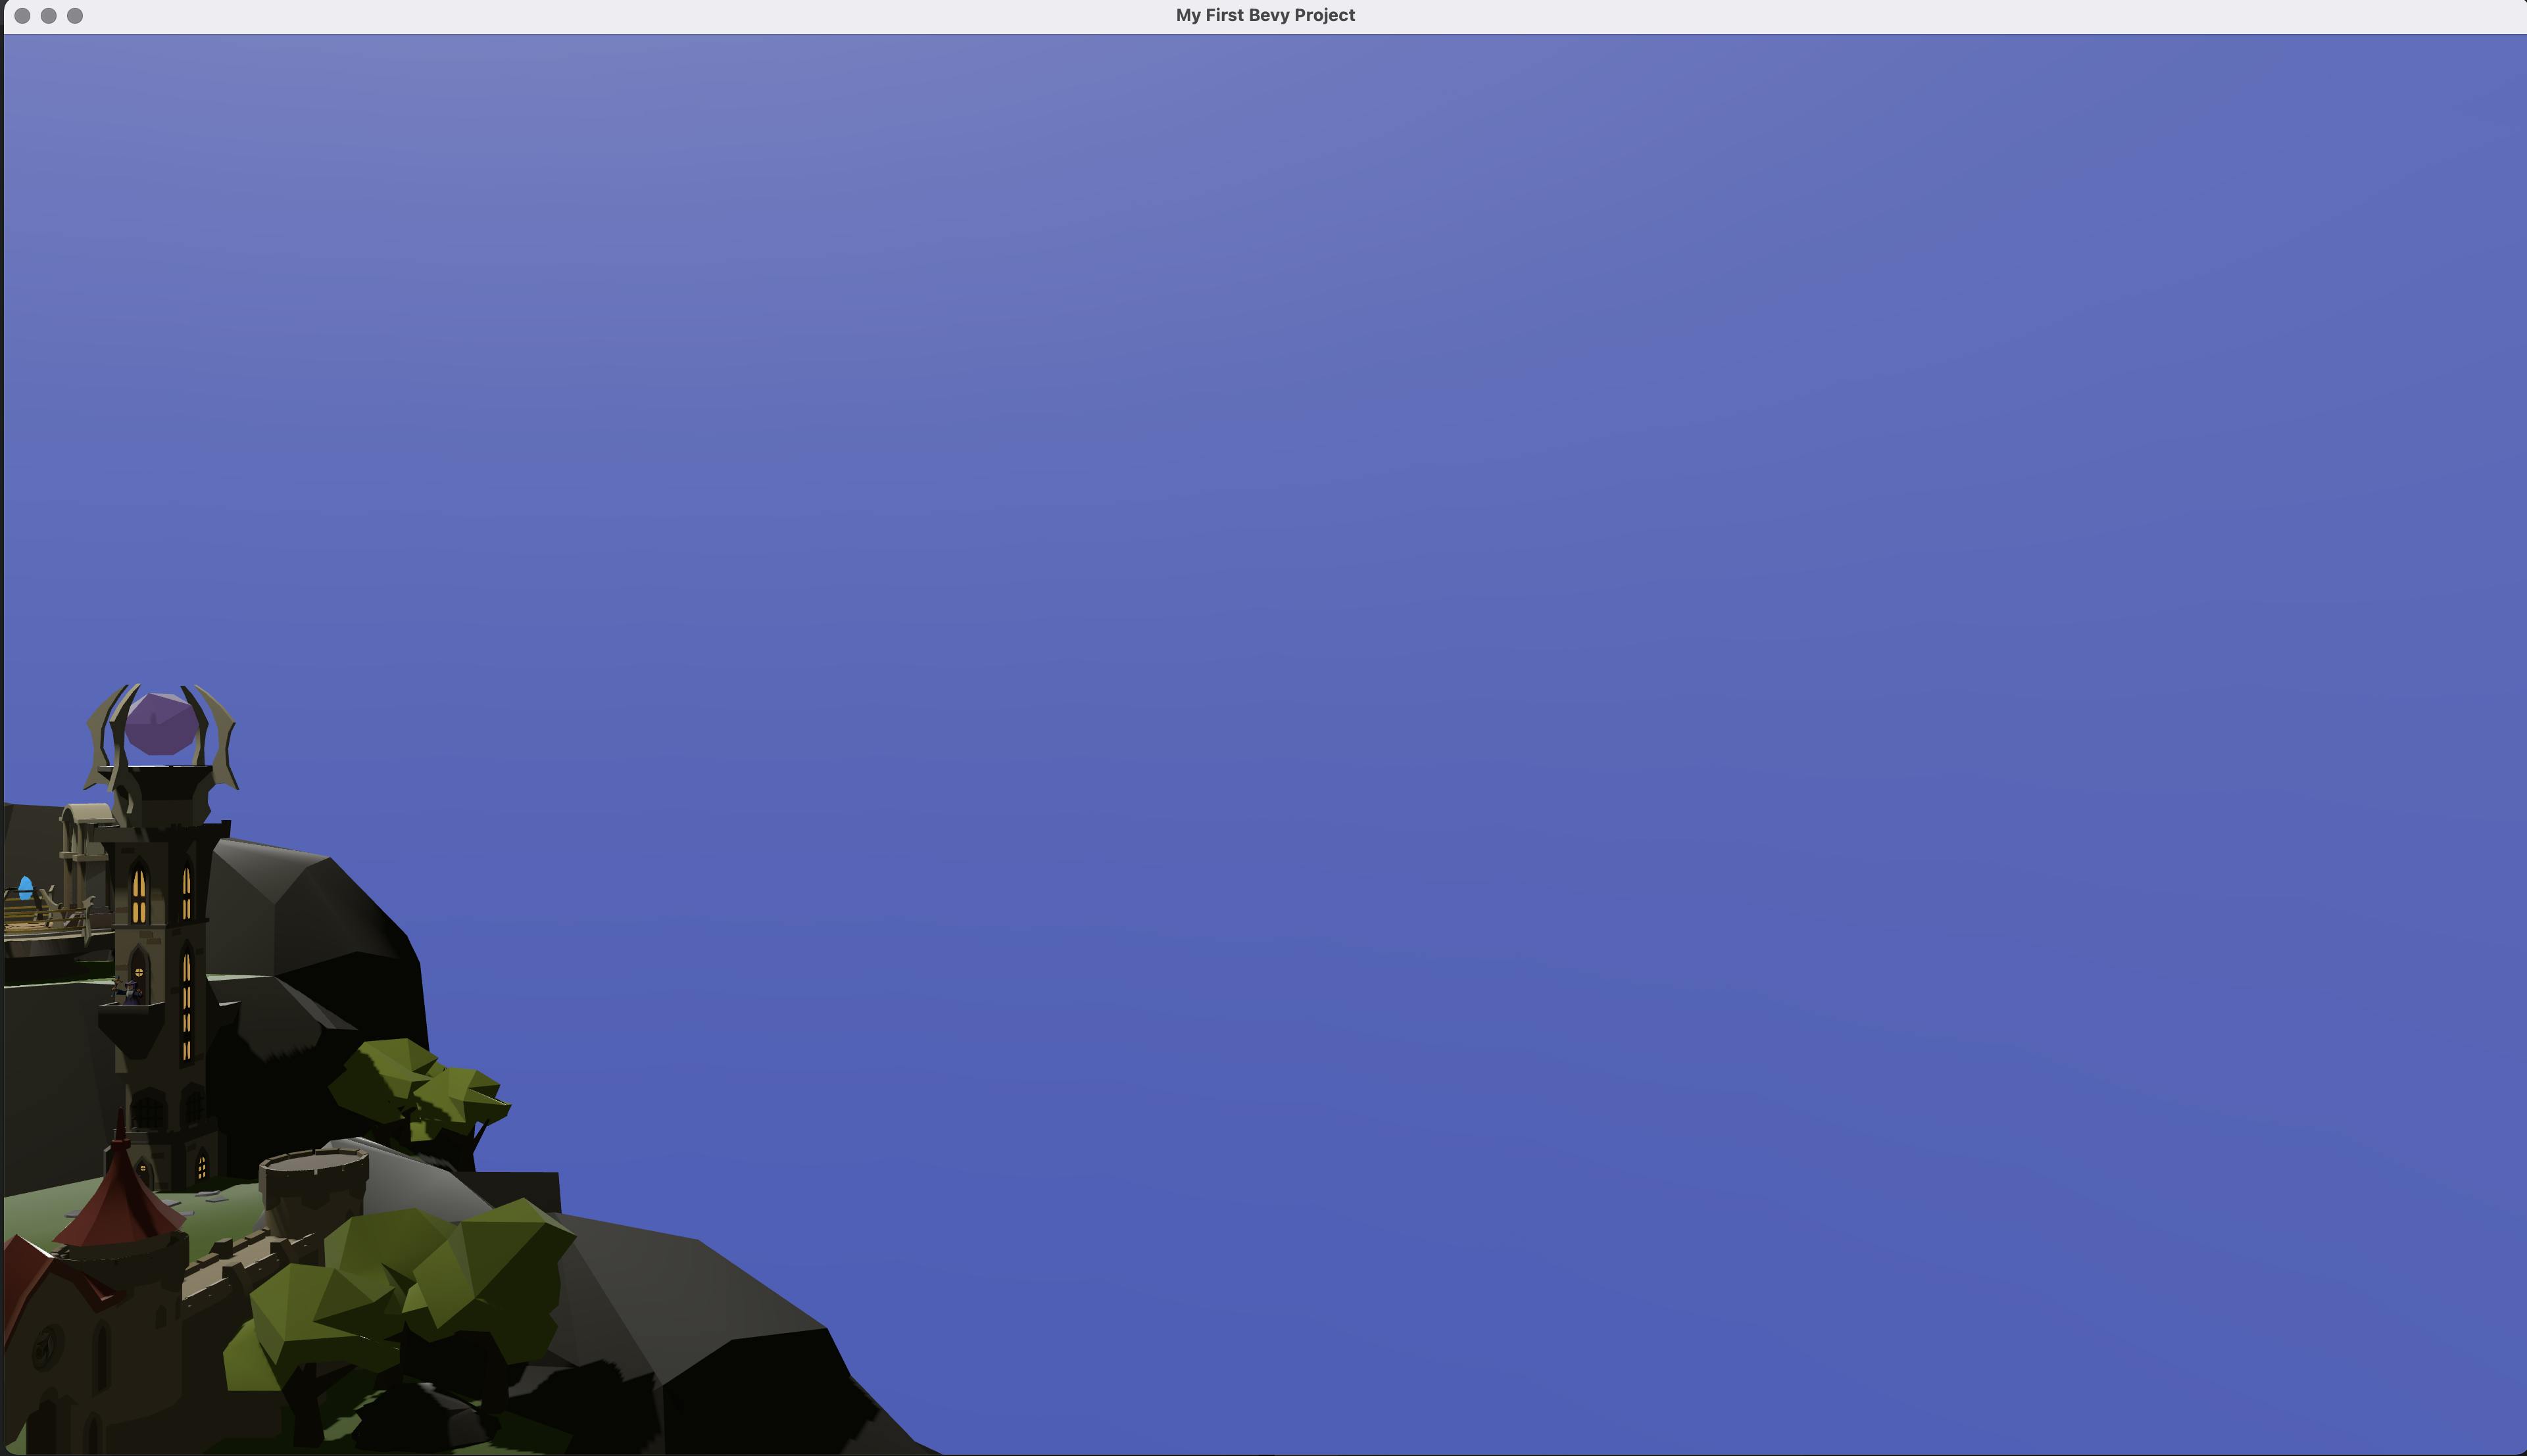
View in the application after successfully adding the sky
Our scene is complete! Feel free to float around and explore your work.
It’s alive!
The final piece is to add a bit of “life” to the scene. We will animate our sun and moon to rotate around our floating island. We have touched upon the systems part of the ECS paradigm by creating a startup system. But startup systems only execute once after the application has been run. Actual systems are functionalities that execute with each rendered frame in the game and are used to move entities around, detect collisions when using some kind of physics engine, and generally, any kind of real-time logic will be implemented using systems. So, let’s write our rotation system.
File: /src/main.rs
fn rotate_sun_and_moon_anchor(
// Time is a resource which keeps track of the elapsed time since the app
// Was started.
    time: Res<Time>,
// Here we query for the Transform component of all entities which have a
// SunAndMoonAnchor.
    mut anchor_transform_query: Query<&mut Transform, With<SunAndMoonAnchor>>
) {
   // We extract the reference to the SunAndMoonAnchor transform from
   // the query result
   let mut anchor_transform: Mut<Transform> = anchor_transform_query.single_mut();

   // Since the transform is a reference (mutable borrow) we have to
   // Dereference it to access the data behind the reference. Next we multiply
   // The current transform value with a rotation transform. We use the helper
   // Quat struct to set up a quaternion for rotation around the z axis and
   // Specify an angle of rotation. Time.delta_second() will help us increment
   // The angle of the rotation each frame of the application
   *anchor_transform = *anchor_transform * Transform::from_rotation(Quat::from_rotation_z(
       (4.0 * std::f32::consts::PI / 40.0) * time.delta_seconds()
   ))
}
The fun part is that we did not have to rotate the Sun and the Moon independently. Remember how we parented them to the “anchor” entity earlier? By doing so, we were able to rotate both the Sun and the Moon by rotating their parent and they would rotate respectively of their position to the anchor as though they were bound by an invisible link.
Here you can check out the view in the application window after successfully rotating the light sources.
The finishing touches
We have finished our application, now it is time to port it for the web. Thanks to WebAssembly porting binaries for the browser, it is quite easy. We will need a couple of dependencies in our project to make it possible.
File: /Cargo.toml
[dependencies]
bevy = "0.6.0"
bevy_fly_camera = "0.8.0"
# Wasm-bindgen will help us build the project for the web
wasm-bindgen = "0.2.79"
# panic_hook will help report errors in the browser console
console_error_panic_hook = { version = "0.1.7", optional = true }

[features]
default = ["console_error_panic_hook"]

# we tell the compiler to make the maximum optimizations (optimization levels
# are 1,2,3) of our code at the expense of longer compile time
[profile.release]
opt-level = 3
After adding needed dependencies, we will have to run a couple of commands. This command will build a binary executable of our project for the WebAssembly and put it in the /target directory inside our project folder structure.
cargo build --release --target wasm32-unknown-unknownWhen the binary is built, we run the second command. The command is a bit long so make sure you write everything before hitting that enter button to run it!
wasm-bindgen --out-dir ./out/ --target web ./target/wasm32-unknown-unknown/release/my-first-bevy-project.wasmThis command binds our wasm modules to Javascript so the application can be used in the web browser.
The final step is to create a simple web page where you will import the script along with the bound modules. In the root folder of our project, create an index.html file and feel free to use the following example:
<html>
 <head>
   <meta charset="UTF-8" />
   <style>
     body {
       background: linear-gradient(#e66465, #9198e5);
       justify-content: center;
       display: flex;
       align-items: center;
     }
     canvas {
       margin-inline: auto;
       background-color: white;
     }
   </style>
 </head>
 <script type="module">
   import init from './out/my-first-bevy-project.js'
   init()
 </script>
</html>
Now you can use whatever server application you have installed on your system to serve this web page or you can use Python to run one.
python -m SimpleHTTPServer 8000Open your browser and navigate to the http://localhost:8000 page and you should see the application load. In order to start flying around in the browser, you will need to click inside the application window.
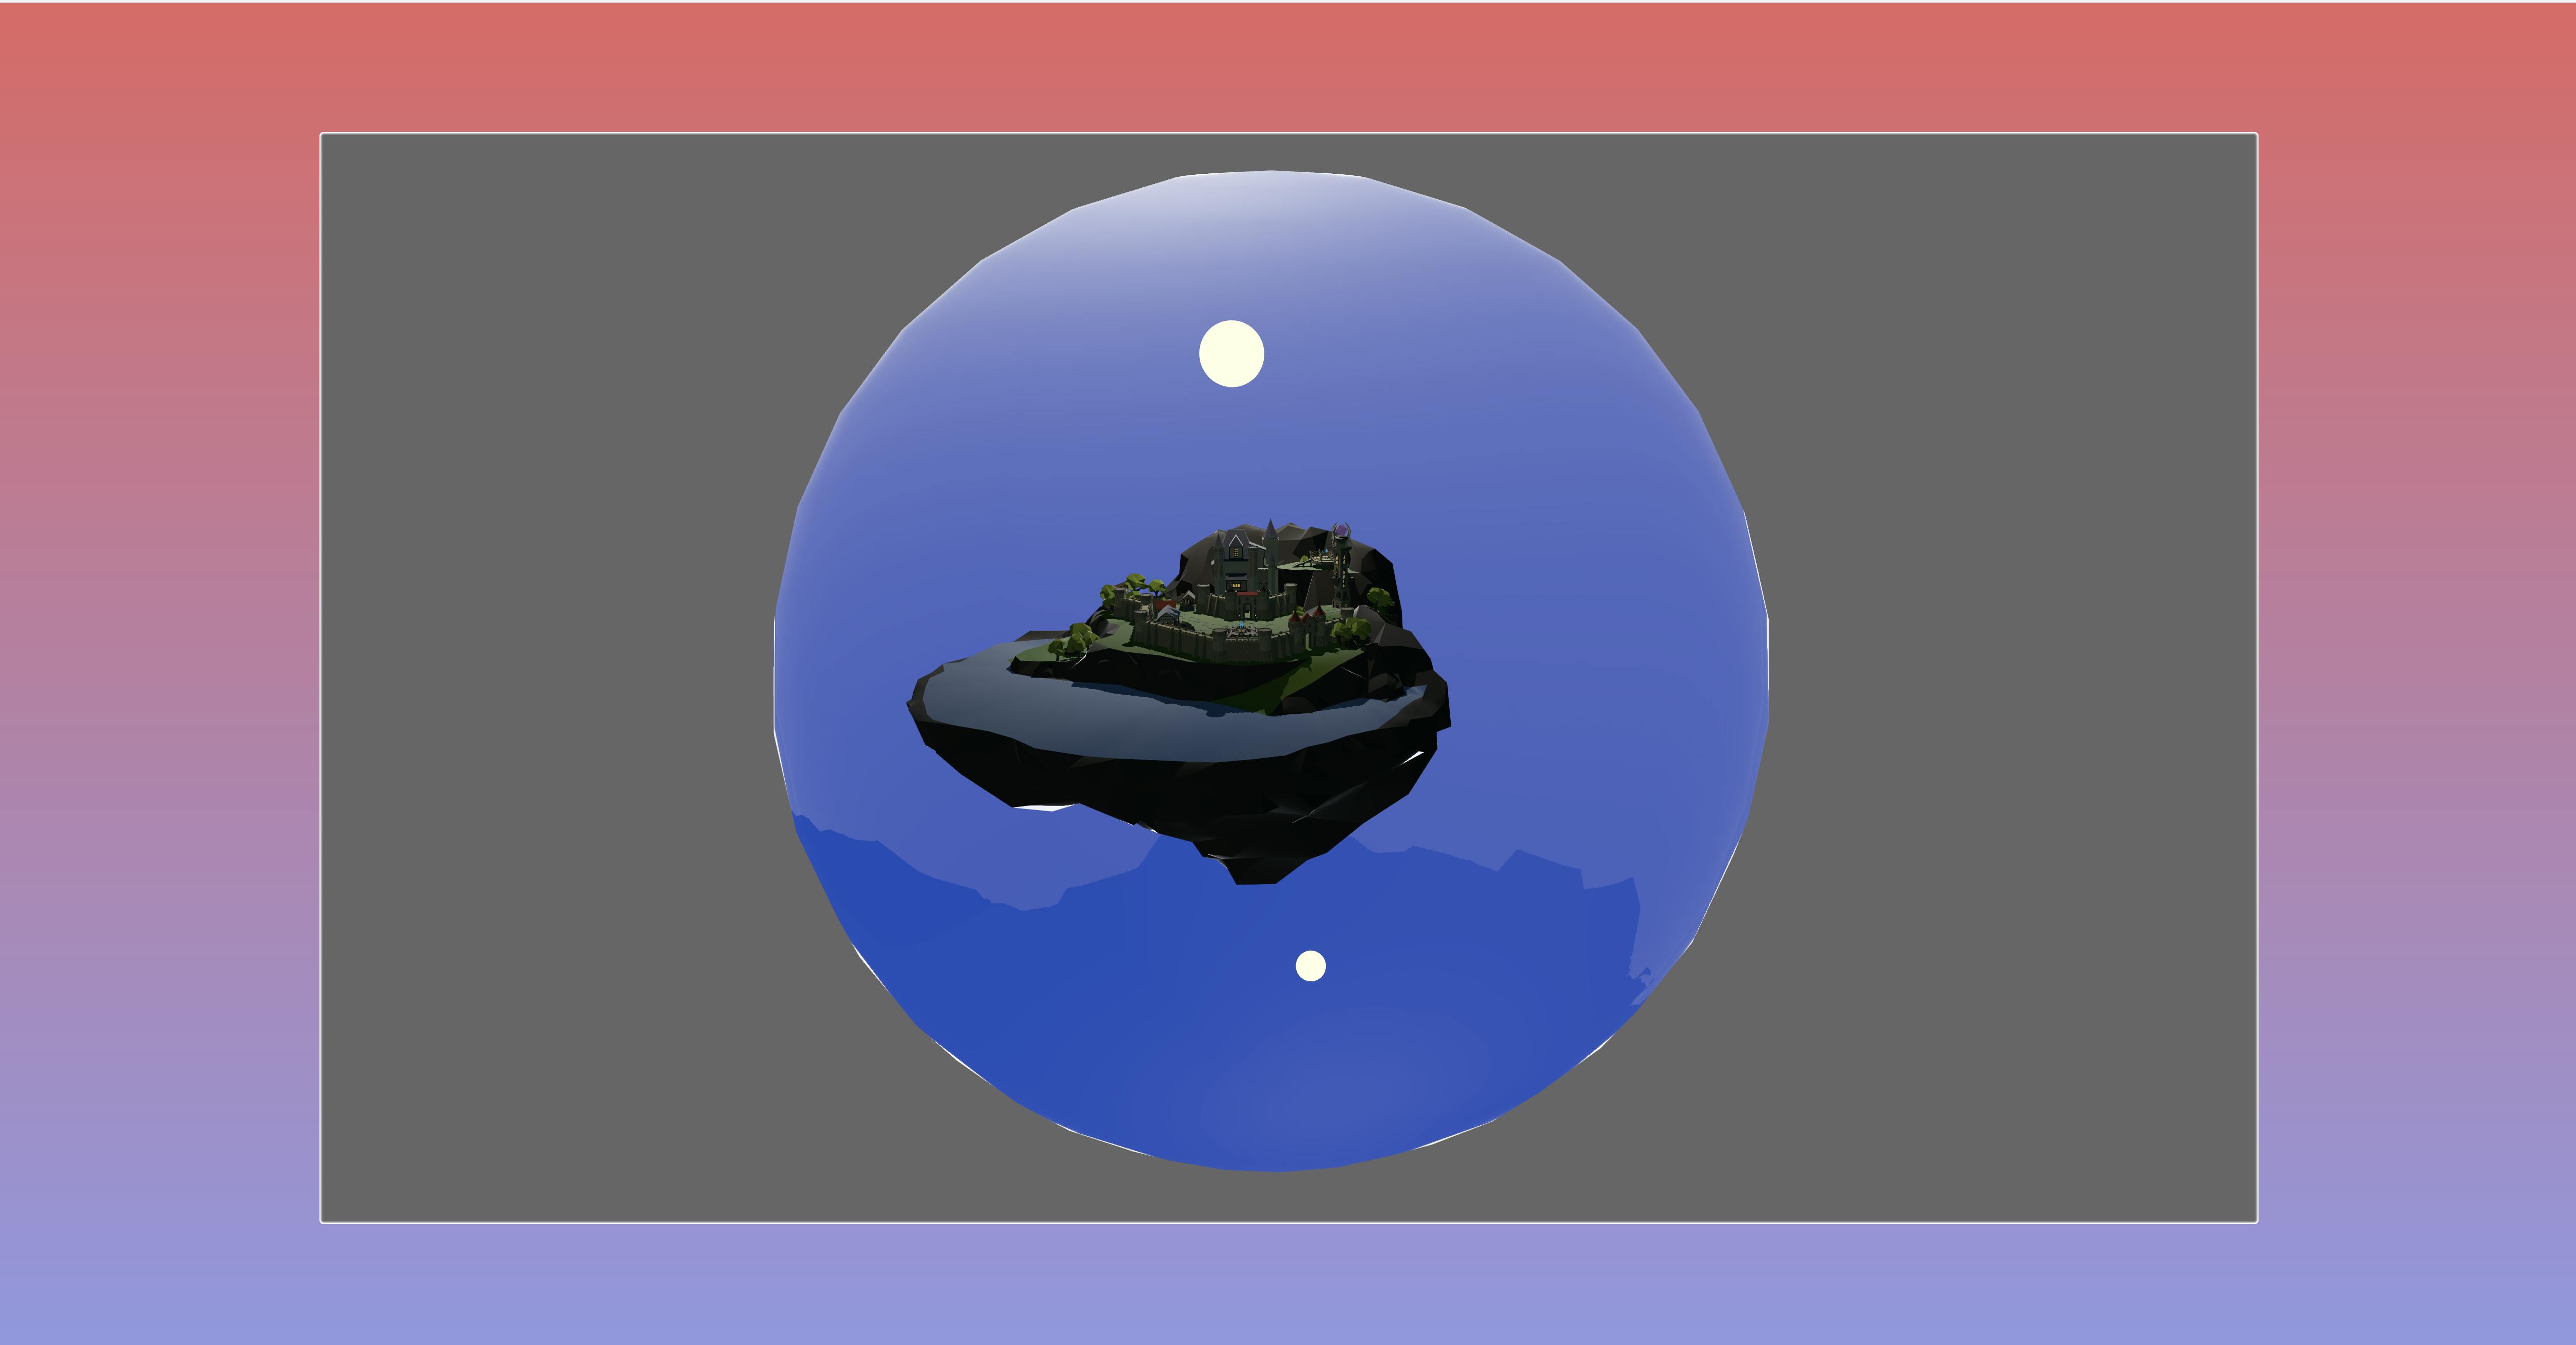
View of the application in the browser
Closing words
We have created a small sample to showcase the capabilities of Bevy. While it is a tool to develop video games primarily, any kind of 3D real-time application would benefit from game engine utilization because game development is at the forefront of 3D application development and provides the most mature technologies, techniques, development tools, and pipelines to create effective 3D applications.
Even though Bevy is barebones software with no GUI, this can be an advantage as we can develop tooling specific for the business domain we are developing a 3D application for. I hope this article/tutorial was easy enough to follow and that you had fun and felt great every time you brought something new to the screen after adding another snippet of code. The web is quite ready to adopt 3D a bit more universally, so we should grab the opportunity and have some fun along the way!
Your take on the subject
They say knowledge has power only if you share it with others - we hope our blog post gave you valuable insight.
If you want to share your opinion or learn more about Bevy, feel free to contact us. We'd love to hear what you have to say!